Make a no-sew pillow cover with an iron and fusible hem tape
Every tutorial tells you to add an inch to the insert. That inch is why your pillow looks like it is wearing a coat two sizes too big.

By NoraRenter DIY · Checked Sep 19, 2026
Some links on this page go to Amazon. As an Amazon Associate I earn from qualifying purchases, which is how the site pays for itself. How this works

Afternoon project 2 of 3 rolls
- Materials$35 to 75
- Takes1 hour
- To undoNothing to undo
- Deposit risk: none
- Drill: no
- Ladder: no
A cover should finish about an inch smaller than the insert going into it, in both directions. Cut it that way, fuse three hems with an iron, and a twenty inch pillow comes out tight in the corners and flat across the face. The whole build happens on a coffee table with no machine in the room.
Renter DIY · deposit risk: none · drill: no
The kit
What you need, and what you can skip
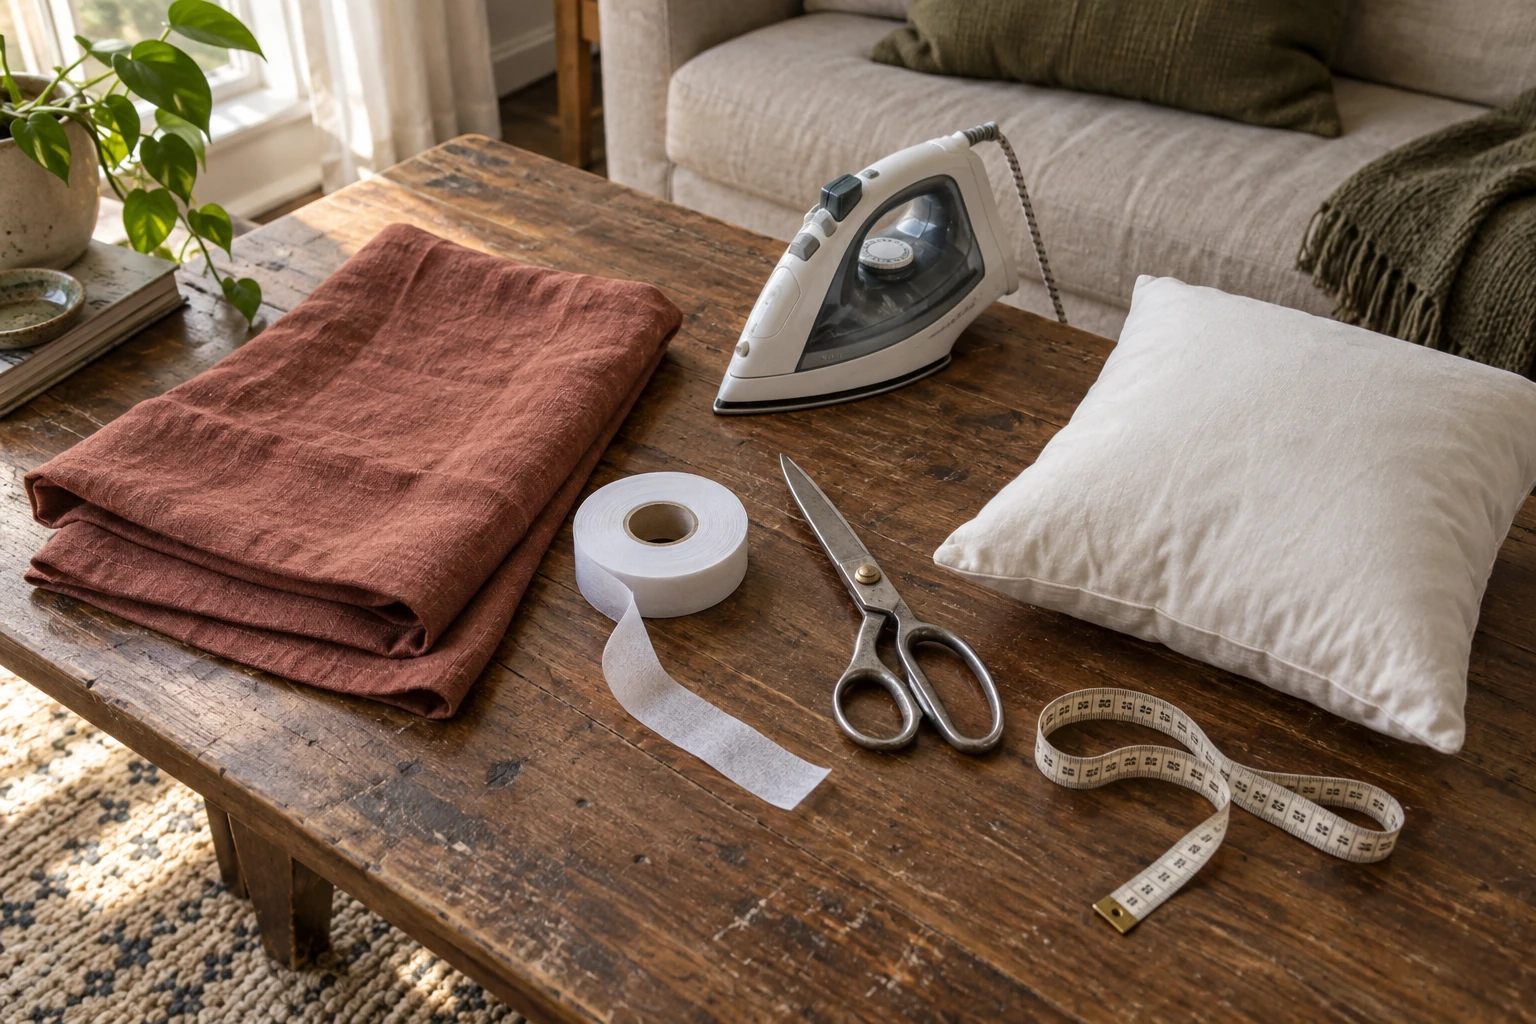
-
2/3 yd
Washed linen, medium weight
There is no link on this row. I tried four linen yardage listings today and could not open one to confirm the width and the fiber content, and a bad link is worse than none. What you want is 100 percent linen rather than a blend, described as washed or softened, somewhere around medium weight, and at least 55 in wide so one cut crosses the whole cover. Buy 1 1/2 yards and you get two covers.
Already have this? A linen tablecloth from the back of a linen closet is the same cloth, already washed and already square.
-
1 roll
Fusible hem tape, 5/8 in wide
Regular weight, not ultra light, which is for chiffon and will not hold a seam that gets sat on. One twenty yard roll does about six covers, so this is the line where you buy once and stop thinking about it. The same roll finishes a cafe curtain panel too, once clip rings stand in for a sewn rod pocket.
See it above -
1
A pillow insert, an inch bigger than your cover
Down alternative holds a corner better than shredded foam and costs about the same. Twenty inches is the size that reads as a proper pillow on a normal sofa. Twenty four is for a deep sectional, and on anything smaller it looks like the sofa is being swallowed.

this is what a full corner looks like. take notes.
-
1 pair
Shears that only cut fabric
Paper blunts a blade in one afternoon, and a blunt blade chews linen instead of cutting it, which is where wavy edges come from. Label them and hide them. This is the one purchase that makes every future fabric job easier.
See the 8 in shears -
1
An iron with steam, and a damp tea towel
The tea towel is the press cloth. It keeps the tape off the soleplate and the shine off the linen. The steam also goes exactly where the tape is.
Already have this? Then the tool list is finished. Skip the press cloth sold next to the tape.
Skip this
You probably do not need the insert. Take the cover off a pillow you already own and dislike, measure the pad inside it, and build to that number instead. The pad is the part nobody sees and it does not care what color the room is. Two thirds of the cost of this project is a thing you are sitting next to right now.
What goes wrong
You cut the cover to fit the insert
It is the one instruction almost every no-sew tutorial gets backwards. Cut a cover that finishes at twenty inches for a twenty inch insert and the filling has nowhere to push, so the corners sit empty, the face goes soft and creased, and the pillow reads as homemade from across the room. The tape, the fabric and your ironing are all fine. The problem is one inch.
Go the other way. Make the finished cover an inch smaller than the insert in both directions and the filling is forced into the corners. That is the difference between the pillow in the photograph at the top of this page and a sad rectangle lying on its side.
Cut sizes, by insert
Front panel, two back panels, and the 1/2 in that disappears into the fused seam on every edge. The back panels are always half the front plus four inches, which is what keeps the opening from gaping.
| Insert | Finished cover | Front panel | Back panels, two | Overlap |
|---|---|---|---|---|
| 18 in | 17 in square | 18 × 18 in | 18 × 13 in each | 8 in |
| 20 in | 19 in square | 20 × 20 in | 20 × 14 in each | 8 in |
| 22 in | 21 in square | 22 × 22 in | 22 × 15 in each | 8 in |
| 24 in | 23 in square | 24 × 24 in | 24 × 16 in each | 8 in |
One cover takes a strip as long as your insert is wide, cut across the full width of the fabric. On linen sold at 55 to 60 in wide that is about 2/3 of a yard for any size on this table, and the offcut is exactly the right shape for a lumbar.
The whole build
Five steps on a coffee table, with the iron doing the sewing
-
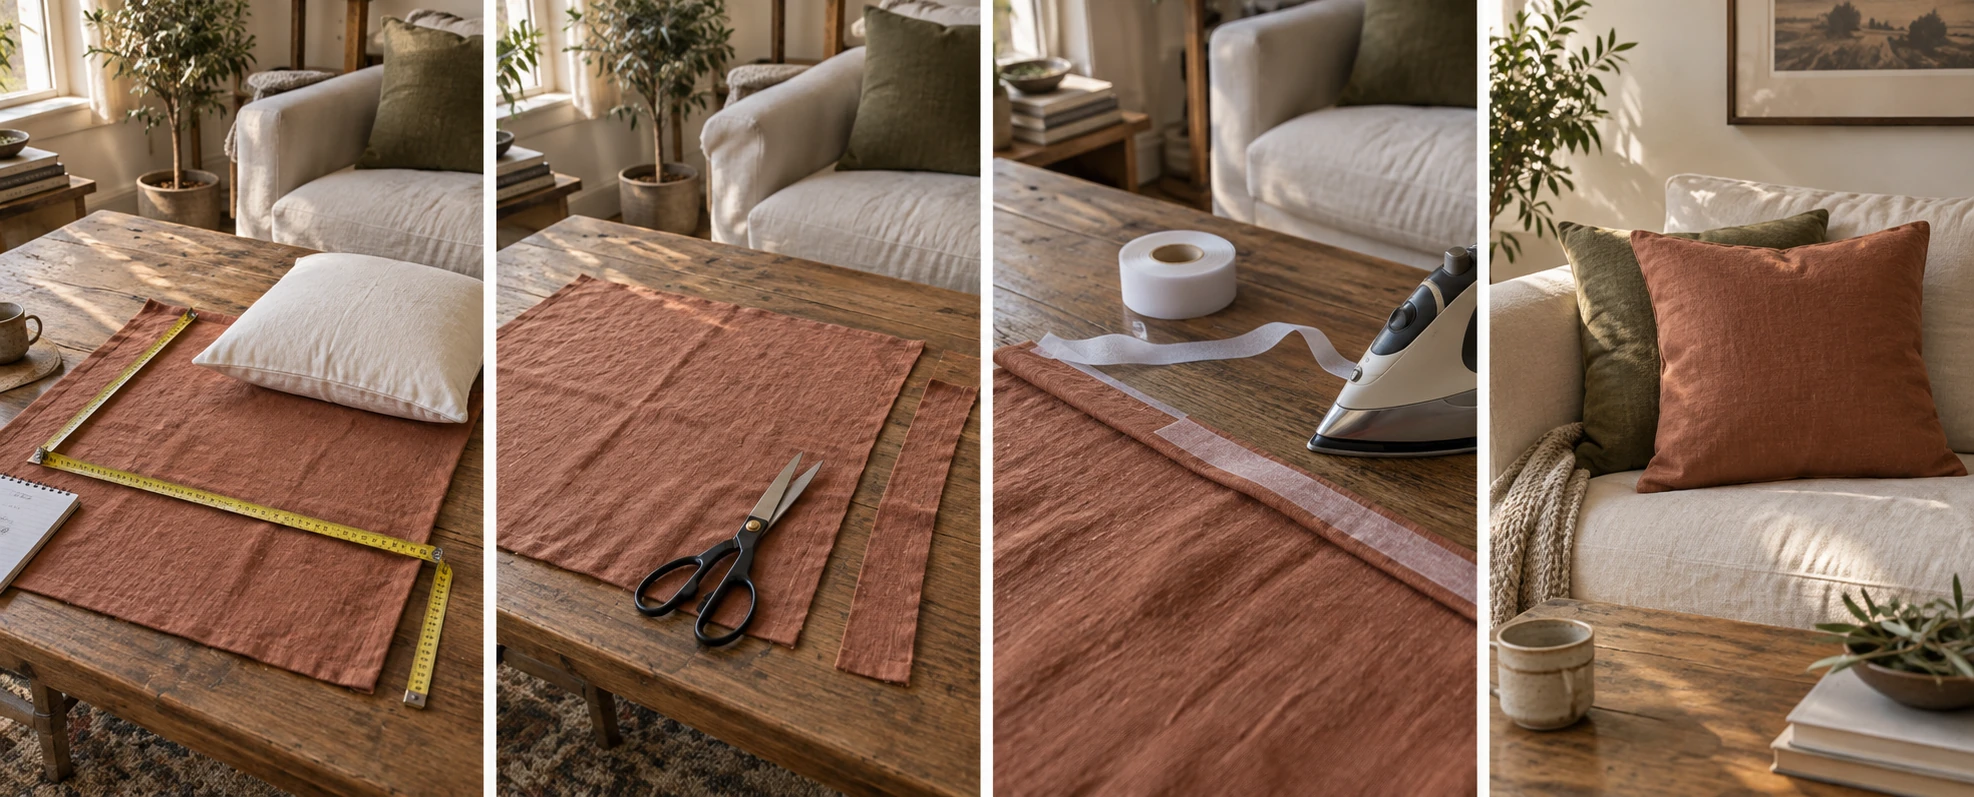
Wash the linen before you cut it
Hot wash, normal dry, then press it while it is still slightly damp. Linen loses three to five percent on its first wash, which on a twenty inch panel is most of an inch. Do this after the cover is built and the fused seams pucker along their whole length, because the tape does not shrink and the cloth around it does.
What goes wrong hereSkipping it because the fabric looks clean. The wash is for the inch the fabric is still holding.
-
Cut one front and two backs
Use the table above. For a twenty inch insert that is one panel at 20 by 20 and two at 20 by 14. Cut along a pulled thread or a folded edge rather than a drawn line, because linen wanders and a crooked cut shows up later as a cover that will not sit square on the sofa.
What goes wrong hereCutting all three from the same corner of the fabric. Keep the grain running the same way on all three or the front and the back pull against each other.
-
Hem the two inner back edges
On each back panel, take the long inner edge, fold it over half an inch and press, fold it again and press. Slide a strip of fusible tape inside the fold, lay a damp cloth on top, and press for ten seconds at a time. These two hems are the only edges anybody ever sees from the outside, so they are worth the extra minute.
What goes wrong herePutting the iron on the tape directly. Fusible web melts onto the soleplate and then onto the next thing you press. It goes between two layers of cloth, always.
-
Build it inside out
Front panel face up. Both back panels face down on top of it, hemmed edges toward the middle, overlapping by eight inches. Line up all four outer edges, run the tape half an inch in from each one, and press in ten second holds along every side. Lift the iron between holds. Do not push it.
What goes wrong hereSliding the iron. Sliding drags the tape out of line and leaves gaps in the seam that you only discover when the insert is halfway in.
-
Let it cool, then turn and stuff
Give it ten minutes flat on the table. Fusible web only reaches full strength cold, so a cover turned while it is still warm peels open at the corners. Then turn it through the back opening, push each corner out with the blunt end of a pencil, press it flat one last time, and feed the insert in corners first.
What goes wrong hereTurning it hot. Every corner you force at minute three is a corner that opens again in a month.
Getting it back
How it comes off, and what is left behind
-
Time
One minute. The cover slides off the insert the same way it went on, and it folds flat into a drawer.
-
What you need
Nothing. No tool touched this project and no tool ends it.
-
What is left
Nothing at all. The apartment was never involved. This is the one project on the site where the landlord cannot have an opinion.
-
Washing it
Cold, gentle, hang dry. Heat is what melted the tape in the first place, so a hot tumble dry is the one thing that can open a seam.

no landlord. no needle. no opinions but mine
Questions people type
Five things worth knowing before you cut
Cut one front panel and two overlapping back panels, hem the two inner back edges with fusible hem tape and an iron, then fuse the four outer edges together with the panels facing each other. Turn it right side out and you have an envelope cover with no machine and no thread.
Nineteen inches finished, which means cutting a 20 by 20 in front and two 20 by 14 in backs and losing half an inch to the seam on every edge. A cover cut to the same size as the insert leaves the corners empty and the face creased.
On these seams, yes. A pillow seam is pulled apart across its width, which is what fusible web is good at, rather than sheared along its length, which is what it is bad at. Use the regular weight rather than the ultra light, press in ten second holds with steam and a damp cloth, and let it cool flat before you stuff it.
Cold and gentle, then hang it to dry. The bond survives washing perfectly well. What it does not survive is a hot tumble dryer, because heat is exactly what made the tape stick in the first place. Wash the linen before you cut, too, or the first wash shrinks the cloth around a tape that does not shrink and the seams pucker.
About two thirds of a yard, cut across the full width of the bolt. A 20 in cover uses a 20 in deep strip and 48 in of width, which fits inside standard 55 to 60 in linen with a piece left over. Buy a yard and a half and you get two covers plus a long offcut that becomes a lumbar pillow.

Doing it this weekend?
Tick what you still need
Leave anything that is already in a drawer. The rest goes to your Amazon cart in one tap.
Amazon shows you the cart first; nothing is bought until you check out there. As an Amazon Associate I earn from qualifying purchases.
Where next