Big art, made on a kitchen table, hung at 57 inches.
Four steps, one canvas, a tub of joint compound. The texture is the easy half.

By NoraRenter DIY · Checked Sep 15, 2026
Some links on this page go to Amazon. As an Amazon Associate I earn from qualifying purchases, which is how the site pays for itself. How this works
Afternoon project 2 of 3 rolls
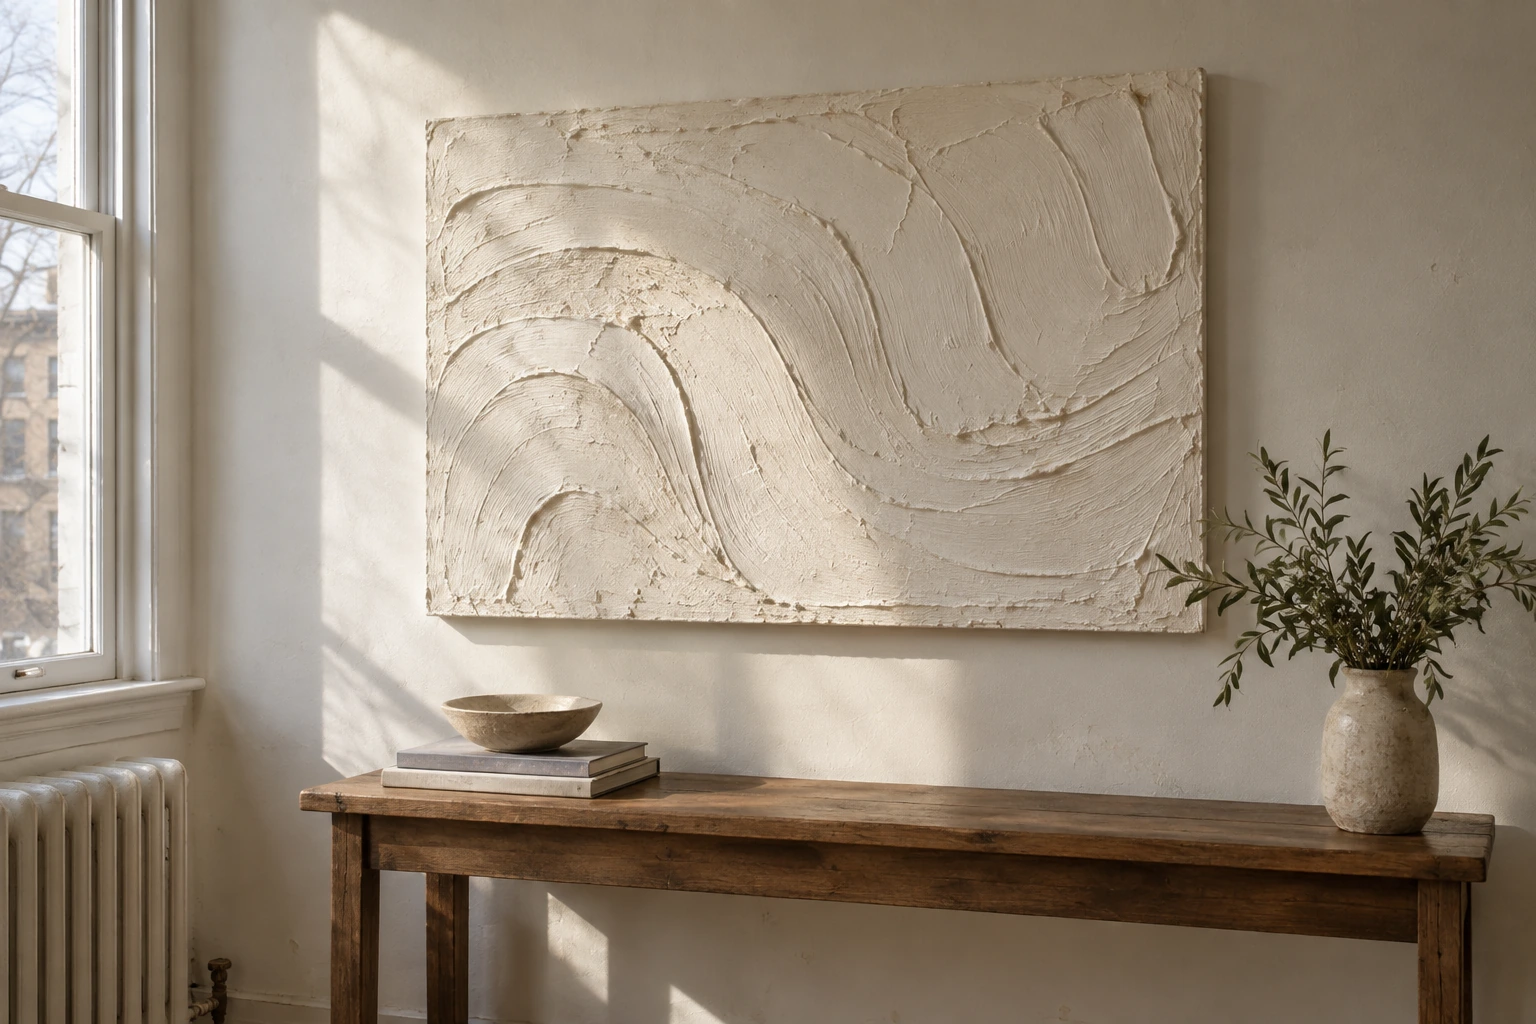
Nothing here touches the wall until the last five minutes. The whole project happens on a kitchen table, on a canvas that is yours.
Renter DIY · deposit risk: none · drill: no
Materials
What you need, and what you can skip
I opened every link on this page on Sep 15, 2026. Amazon will not give me prices or product photographs without their API, so what you get is the name, the variant, why it is that one, and what is wrong with it. Two of the six below you can talk yourself out of before you check out.
-
FIXSMITH Stretched Canvas for Painting
24 × 36 in · 2 pack · 5/8 in profile24 × 36 is the smallest canvas that reads as art rather than as a postcard once it is over a sofa, and it is the size the hanging math further down is built on. The two pack is the real reason for this one: the first canvas is where you learn how thick is too thick, and learning that on your only canvas is miserable.
The catchThe profile is 5/8 in, which is thin. If you want the chunky gallery edge, you want a 1.5 in canvas instead, and then the floater frame below does not fit it.
See it above Opens Amazon in a new tab
Short arcs, kept thin -
DAP White Light Weight Joint Compound
1 gal · premixed · lightweightPremixed, so there is no mixing bucket and no dust in a small apartment. Lightweight is the word that matters: the lightweight formula shrinks less as it dries than the all-purpose kind, and shrinkage is what opens the hairline cracks across a thick ridge.
The catchA gallon is far more than two canvases will ever use. If there is half a tub of lightweight spackling paste in a closet from patching nail holes, that is the same material and you are done shopping for this line.
See the 1 gal tub on Amazon Opens Amazon in a new tab -
Bates 6 Inch Flexible Drywall Spackle Knife
6 in blade · flexible · spackle and scraperSix inches is the width that lets you pull one arc across a 24 in canvas in four strokes. Flexible is the other half: a stiff blade digs a trench at its corner every time you change angle, and a flexible one rides over what it just laid down.
The catchYou do not need this. An expired gift card gives you a 3 in flexible edge for nothing, and the small arcs it makes are, if anything, prettier. Buy the knife when you decide you like doing this.
See the 6 in knife on Amazon Opens Amazon in a new tab
Six inches, four strokes -
Rust-Oleum Painter’s Touch Latex Brush-On Paint
Flat white · half pint · brush-on, not aerosolFlat, not eggshell. A flat finish keeps the shadows in the ridges doing the work; anything with sheen puts a highlight on every peak and the piece goes shiny and cheap under a lamp. Half a pint is one canvas primed and painted with a little spare, and brush-on is the point: you cannot dry brush the side of a ridge out of an aerosol can.
The catchWhite is the safe answer, and it is not always the right one. If your walls are the usual rental off white, a warm cream or a clay tone makes the piece read as chosen rather than as missing. Same product line, different color.
See the flat white on Amazon Opens Amazon in a new tab -
Pixy Canvas Floater Frame
24 × 36 in · natural oak · fits 5/8 in deep artworkA floater frame is the difference between a canvas and a piece. It holds the canvas with a shadow gap around it instead of covering the edge, which is what you want when the edge has texture running over it. This one is listed for artwork up to 7/8 in deep, so the 5/8 in canvas above drops straight in.
The catchThis is the line to cut if you are cutting one. An unframed textured canvas over a console looks deliberate; it just looks quieter.
See the 24 × 36 frame on Amazon Opens Amazon in a new tab -
Command Large Picture Hanging Strips
15 lb large · 14 pairs · whiteThis is how the piece gets onto a wall you do not own. Strips are sold by the pound, not by the picture, so the number on the pack is the number you match to your finished weight. A 24 × 36 canvas with compound on it is heavier than a bare one, which is why the weighing step exists further down.
The catchFourteen pairs is a lot of strips for one canvas. It is the right pack anyway, because you will use the rest on everything else in the apartment, and a half used pack is not wasted.
See the 15 lb pair on Amazon Opens Amazon in a new tab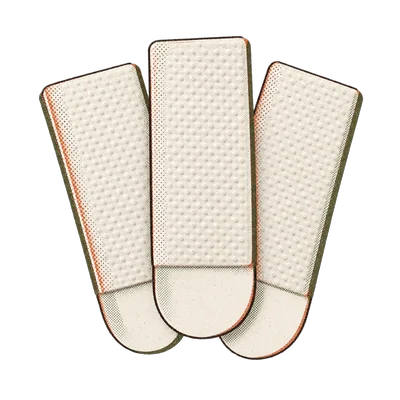
By weight, not by size
-
Part two
Skip this
Gesso. The canvas is already primed five times over and you are covering it in plaster. Texture medium from the art store. It is the same job as joint compound at a fraction of the volume. A palette knife set. You need one edge, not nine. A separate sealer. Matte paint is the seal on this piece; a varnish over it puts a sheen back on the thing you made matte on purpose.
-
Part three
If you cannot find it
- Canvas
- Any pre-primed stretched canvas, or a thrifted painting you do not like. Compound goes straight over an old oil landscape.
- Joint compound
- Lightweight spackling paste, any hardware store, same aisle. Avoid anything sold as a patch that dries hard in twenty minutes.
- Knife
- An old gift card, a plastic pan scraper, or the flat of a butter knife for the small ridges.
- Paint
- A sample pot of matte wall paint from any paint store, in the off white your walls already are.
- Strips
- Any adhesive picture hanging strip that states a weight rating on the pack. The brand matters far less than the number.
-
Part four
Before you start
Thickness is the whole project. Over about a quarter of an inch, it cracks as it dries. Two thin passes, not one thick one. No forced heat. A hair dryer skins the surface and crazes it. Do not paint it damp. Sealing wet compound traps the water and the cracking happens under the paint, where you cannot fix it. Cover the table. Compound wipes off while wet and chisels off once dry. Weigh it before you buy strips, on a bathroom scale, holding it and then not holding it.
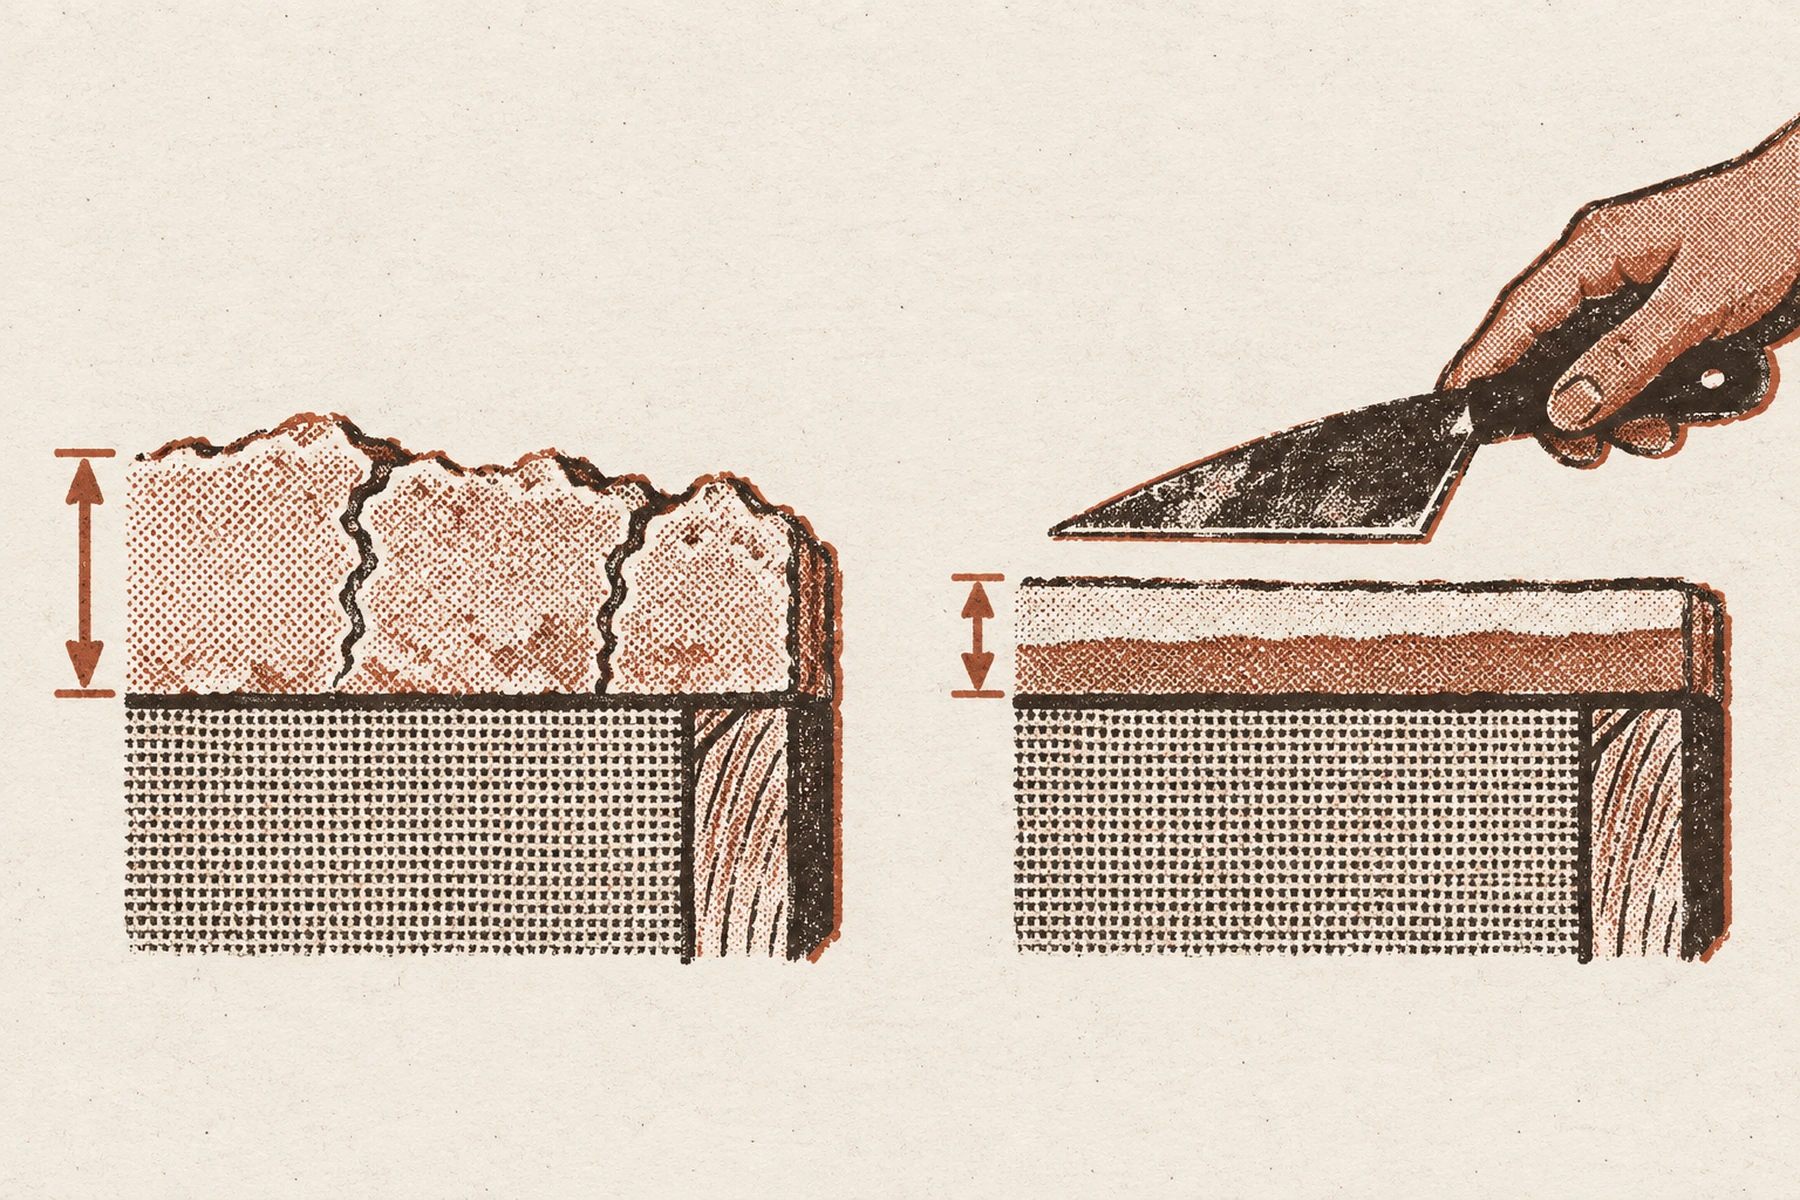
From the front these two look identical while they are wet. The edge is the only place the difference exists, and it is the difference between cracked and not. -
Part five
Why this works in a rental
The project happens on a table, not on a wall, so there is no surface in this apartment that you are altering and no conversation to have with anyone. It hangs on adhesive strips, which means no anchor, no drill and no filled hole at the walkthrough. And it is a canvas: it comes off the wall in one piece, goes flat in the moving van, and goes up in the next place at the same height on a different wall.

The table is mine. You are renting a corner of it.
-
Materials
$55 to 110
A two pack of 24 × 36 canvas, a tub of compound, a knife, a small can of paint. The frame is the part you can drop.
-
Hands-on time
90 min
Split in two. About an hour spreading, ten minutes painting the next day.
-
To move it
1 box
It is a canvas. It goes flat against the back of the wardrobe in the van, and the wall never knew.
Overnight drying is not in that 90 minutes, and it is not optional. Rush it and the paint seals a wet surface that then cracks from the inside.
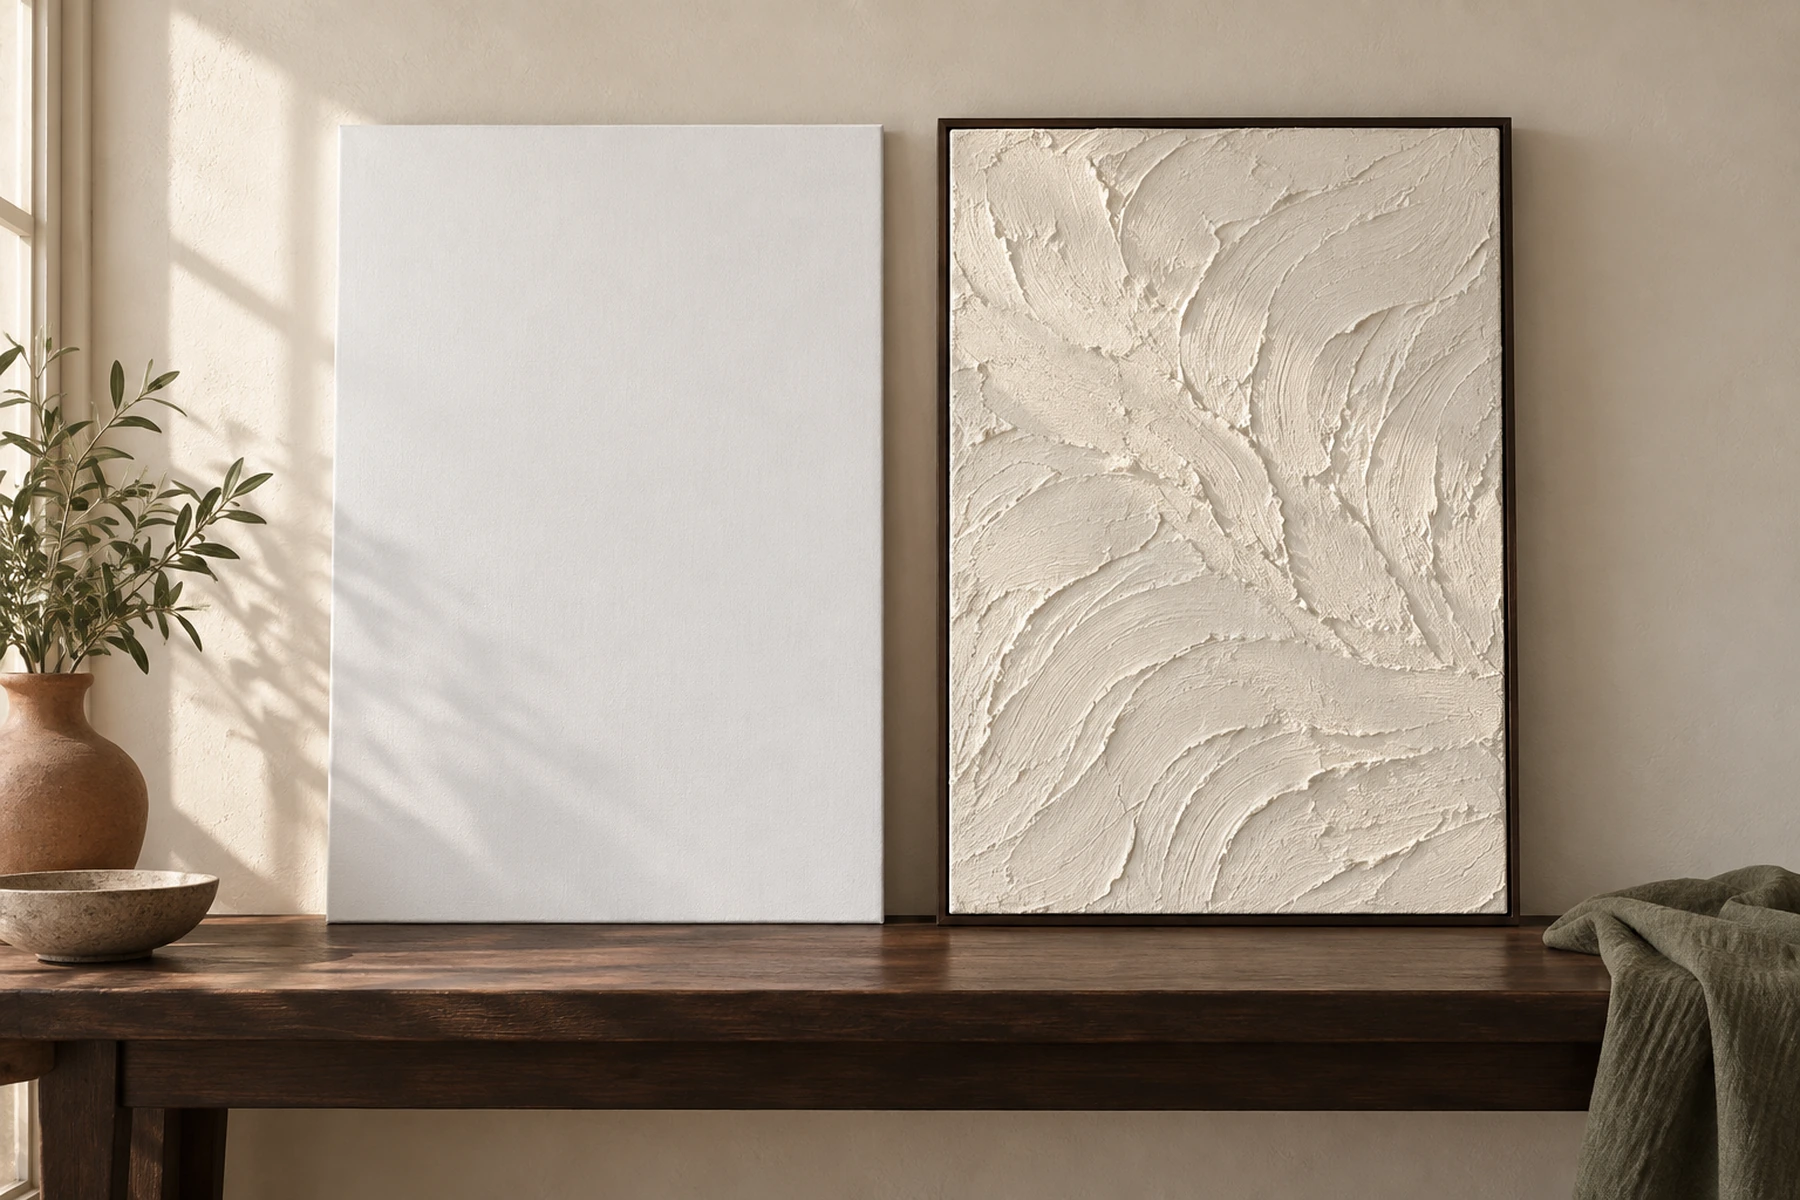
The whole build
Four steps, and one of them is waiting
Same table, same light, same camera height in all four photographs, because the only thing that should change between them is what your hands are doing. Read the mono line under each one before you start that step, not after.
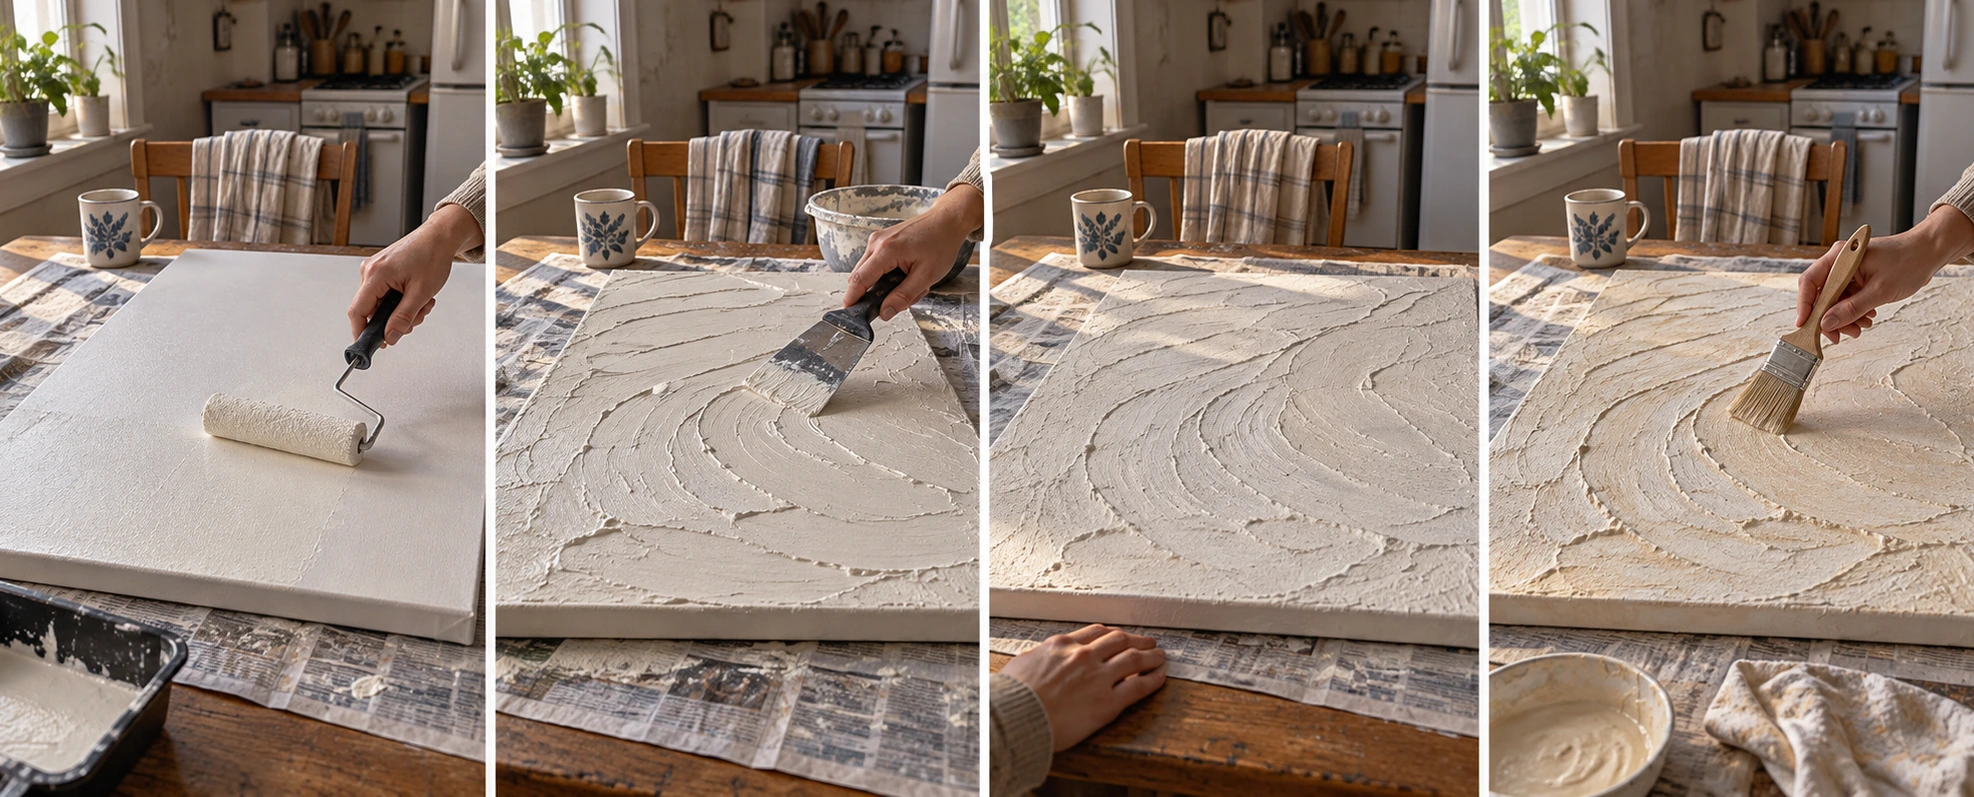
-
1
Prime
Lay the canvas flat and roll one thin coat of your matte paint over the whole face. Let it go touch dry, about half an hour. Compound grips a painted surface better than it grips raw gesso, and a white ground under white texture is what stops the finished piece looking gray in the shadows.
What goes wrong here
Working on the wall instead of the table. A vertical canvas lets wet compound slump, and slump dries as a drip you cannot sand off without tearing the weave.

One thin coat -
2
Build texture
Scoop compound onto the knife and spread it in short arcs, thin, keeping the ridges under about a quarter of an inch. Leave bare patches. Go back over it in a second pass once the first has stiffened, which is how you get depth instead of a stucco ceiling.
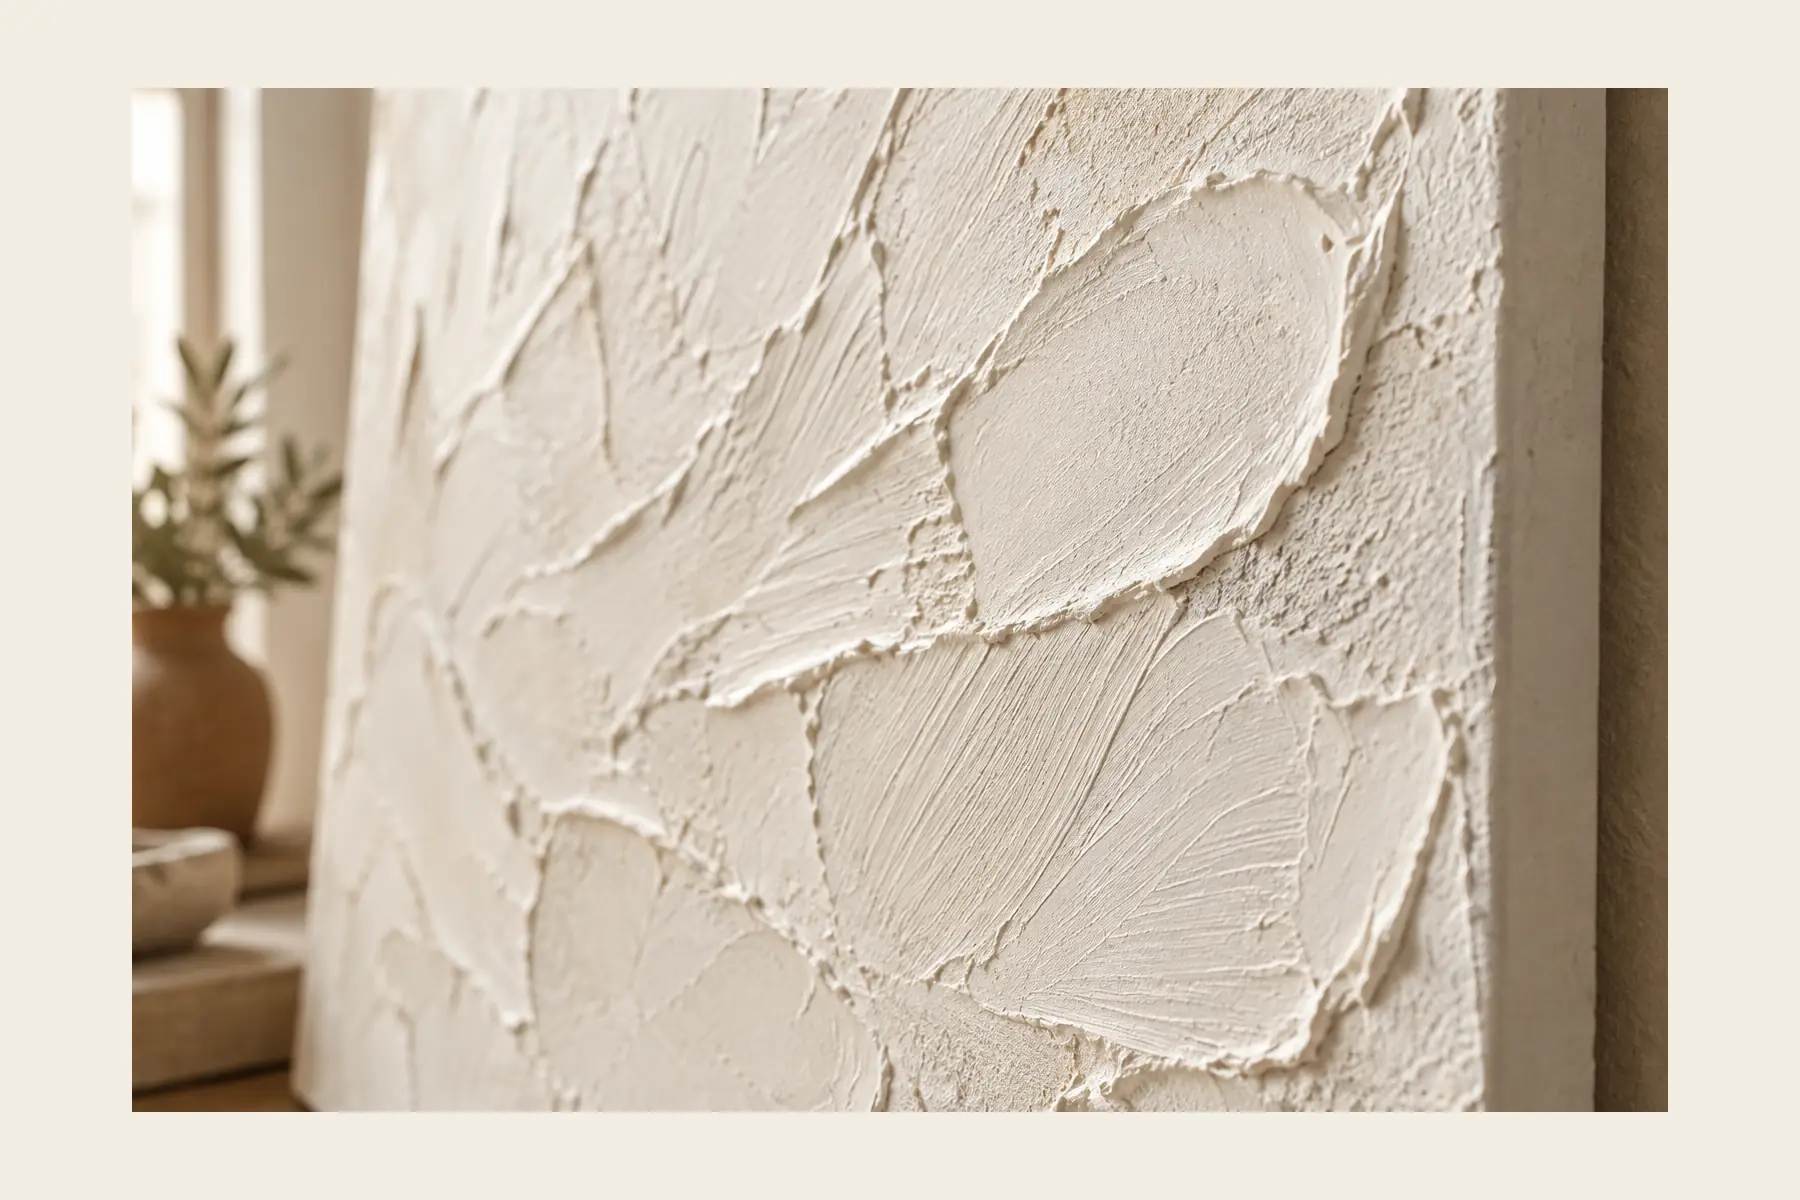
The ridges, close up What goes wrong here
Thick. Anything over about a quarter inch cracks as it dries, every time, and this is the failure almost nobody warns you about. Two thin passes beat one fat one.
-
3
Let dry
Flat, overnight, in the room it will live in. A full 24 hours if your ridges are on the deep end. The compound goes from bright white and cold to matte and room temperature, and touching the back tells you more than looking at the front.
Two ridges, same canvas What goes wrong here
A hair dryer or a radiator. Forced heat dries the skin before the body, and the skin then cracks in a web as the inside catches up.
-
4
Paint
One coat of the same matte paint, worked into the sides of every ridge with a dry brush rather than flooded on. Two coats if you want it flatter. The paint is also the seal: it is what stops the compound chalking onto your hands and onto the wall behind it.

You left this open. I did not open this.
What goes wrong here
Loading the brush. A wet brush pools in the low spots and fills in the texture you just spent an hour making.
Where it goes
57 inThe texture was the easy half. Now the height.
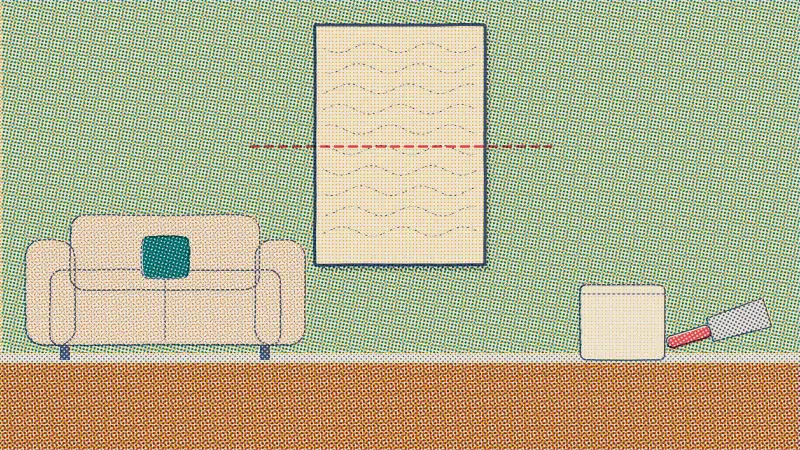
This is the part that decides whether the thing you just made looks like art or looks like a canvas someone leaned on a nail. Three numbers, and none of them are about plaster.
-
Height · n09
Center of the piece at 57 to 60 in from the floor
Measure to the middle of the canvas, not to the top edge and not to the hanging strip. 57 is a starting point, a little below standing eye level and above sitting eye level, and it is lower than the height your arms want to put it. A 36 in tall canvas centered at 58 has its top edge at 76 in and its bottom at 40, which is why it clears a console and still feels attached to it.
Mark the wall at 58 with a pencil and a piece of tape before you peel anything. The mark is free and the strip is not.
-
Width · n10
Two thirds to three quarters of the furniture underneath
A piece over a sofa or a console is not judged on its own. It is judged against the thing below it, and the eye wants the art to span most of that width without matching it. A 60 in console wants something 40 to 45 in wide. One 24 in canvas over that console is the mistake everyone makes, and it is why the canvas above comes in a two pack.
Leave 6 to 8 in of wall between the top of the furniture and the bottom of the piece. More than that and they stop reading as one composition.
-
If you made two · n11
2 to 3 in of gap, and the pair centered at 57 to 60
Two canvases side by side are one object, so the 57 to 60 applies to the middle of the pair, not to the middle of each one. Keep the gap tight. Two to three inches reads as a diptych; six inches reads as two people who could not agree.
Cut a strip of cardboard to your gap and hold it between the canvases while you stick the second one. Measuring a gap in the air with a tape, above your head, is how the gap ends up crooked.
And how it stays up, with no drill
Adhesive strips are rated by weight, and that is the only spec that matters. A bare 24 × 36 canvas is light. The same canvas carrying a pound or two of dried compound and a wood floater frame is not, and people size the strips for the canvas they bought instead of the thing they made.
- 01Weigh yourself, then weigh yourself holding the finished piece. The difference is your number.
- 02Read the pack. Use the number of pairs it lists for that weight, then add one more pair.
- 03Press each strip for 30 seconds, then leave the wall an hour before you hang anything on it.
Undo it
And how it comes back down
Quick answers
Six things people search before they start
Premixed lightweight joint compound, the tub sold for drywall, spread on a primed stretched canvas with a flexible knife. Lightweight spackling paste is the same material under a different label. Art store texture medium works and gives you a tenth of the volume for a similar outlay.
It went on too thick. Compound shrinks as the water leaves, and above roughly a quarter of an inch the surface dries faster than the body underneath and splits. Two thin passes with an hour between them give you the same depth and no cracks. Forced heat from a hair dryer or a radiator does the same damage for the same reason.
Overnight for thin work, a full 24 hours for deep ridges, flat and at room temperature. It looks dry hours before it is dry. The tell is temperature: a patch that still feels cold against the back of your hand is still holding water.
Center of the piece at 57 to 60 in from the floor as a starting point, a little below standing eye level. Where you sit, go lower, around 50 to 54 in. Over a sofa or a console, keep 6 to 8 in between the furniture and the bottom of the piece, and make the piece two thirds to three quarters as wide as the furniture.
Yes, on adhesive picture hanging strips, and you choose them by weight rather than by canvas size. Weigh the finished piece on a bathroom scale, use the number of pairs the pack lists for that weight, and add one more pair. The wall has to be smooth, clean and painted more than a month ago. Or skip the weight math entirely and lean it on a picture ledge instead, which is also how you get to swap it out later.
Nothing in the build touches the wall at all. The only contact is the adhesive strips at the end, which release by pulling the tab straight down along the wall. Do that slowly, at the end of the lease, and the wall is as you found it. On flat or dead matte builder paint, test one strip low down first.

Doing it this weekend?
Tick what you still need
Leave anything that is already in a drawer. The rest goes to your Amazon cart in one tap.
Amazon shows you the cart first; nothing is bought until you check out there. As an Amazon Associate I earn from qualifying purchases.
Where next